1. To mimic the weathering that takes place in real life I feel like you need to work in layers. The much that you find on a tank, or the sleight discoloration that you see on equipment that is left out side did not occur over night, it happened over time, layer upon layer. I think representing realistic weathering in modeling is best done the same way, layers.
2. Oil paints. I really like using oil paints for realistic weather effects. I have a bin that is full of enamel paints, oils paints in tubes, brushes and orderless mineral spirits, this is the core of what I use for weathering. When oil paints are applied over an acrylic surface, you can easily erase, mix, move around and blend the oil colors while safely leaving the bottom acrylic layer safe.
3. Patience. Oils take time to dry, and steps need to be taken between applications to ensure that previous work is not disturbed. Some modelers do not like "steps", this process takes time, and patience, if you are not willing to learn them, experiment with them and use them, maybe oils for weathering are not for you.
So what are my "layers" that I use to create realistic weathering effects.
1. Primer - a good primer goes a ling way to any project. Often times with the type of weathering I like to do I am masking, scrubbing, rubbing and scraping the surface. A good primer will keep paint from peeling.
2. Quality paint - I use p3, Tamyia, and Vallejo paints. I find there colors to be very vivid and for the most part the coverage is great. For heavy paint chipping I do prefer to use Vallejo and Tamyia paints over p3. I find the p3 gets a little "gummy" when trying to do paint chipping. This layer will sometimes consist of multiple layers and includes the layers of the paint chipping, and the top layer, along with any other colors that may be used to create the effects that I am after.
3. Surface discoloration - This is typically my first layer of oil paint weathering. I will go into more detail later about how to this layer works and the purpose it serves. This layer also helps to tie together all the paint chipping you have done, and kind of helps to unify everything.
4. Panel discoloration - This is the second layer I do where I will pick random panels or areas of a model and alter the base color of the model slightly, either making it darker, lighter or change the tone slightly.
5. Specific Weathering - This final layer is where I will go back to some of the chips I made, create rust streaks, grime streaks, or emphasize some chipping.
These are just some of the general thoughts that I have regarding how I approach weathering a model, onto talking about surface discoloration.
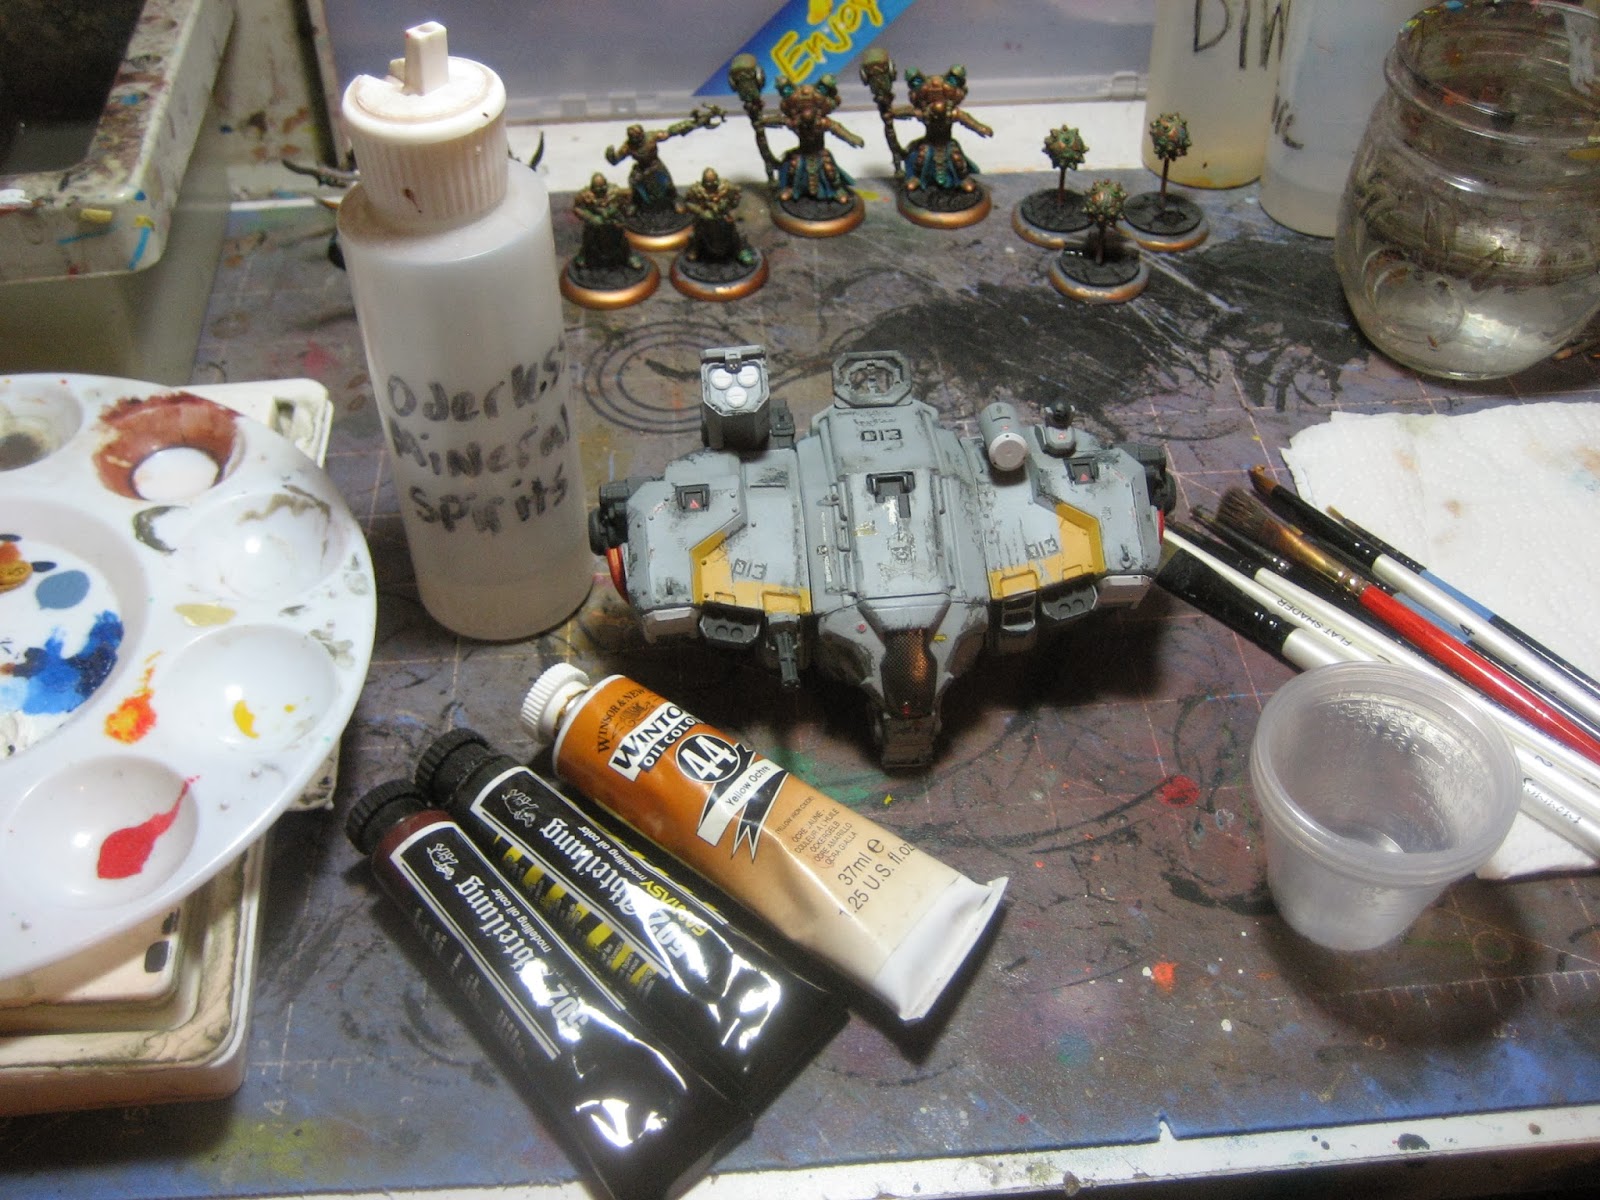
To start with here is an image of the model I am working with and the supplies I am using. You will need a paper towel, brushes, Odorless Mineral Spirits, mixing cups, a palette and of course your paints. I picked 3 specific colors for this part of the process, Yellow Ocher, Dark Rust, and Starship Filth. The first 2 colors are pretty warm colors, I did this because as you can see in the photo my original surface is pretty cool. The third color I picked, Starship Filth is a pretty cool dark grey, this is an attempt to just even things out a bit. The whole purpose of this initial layer is to create the general discoloration that comes from exposure to the elements. This weathering is applied all over the model and will change the final color, so when choosing your base color, keep in mind that it may be different than what you intend the final color to be.
The process is started by dipping a wide flat brush into the mineral spirits and then "wicking" as much of the excess off on a paper towel. Then take this brush to the area you intend to weather and brush the mineral spirits on to the surface.
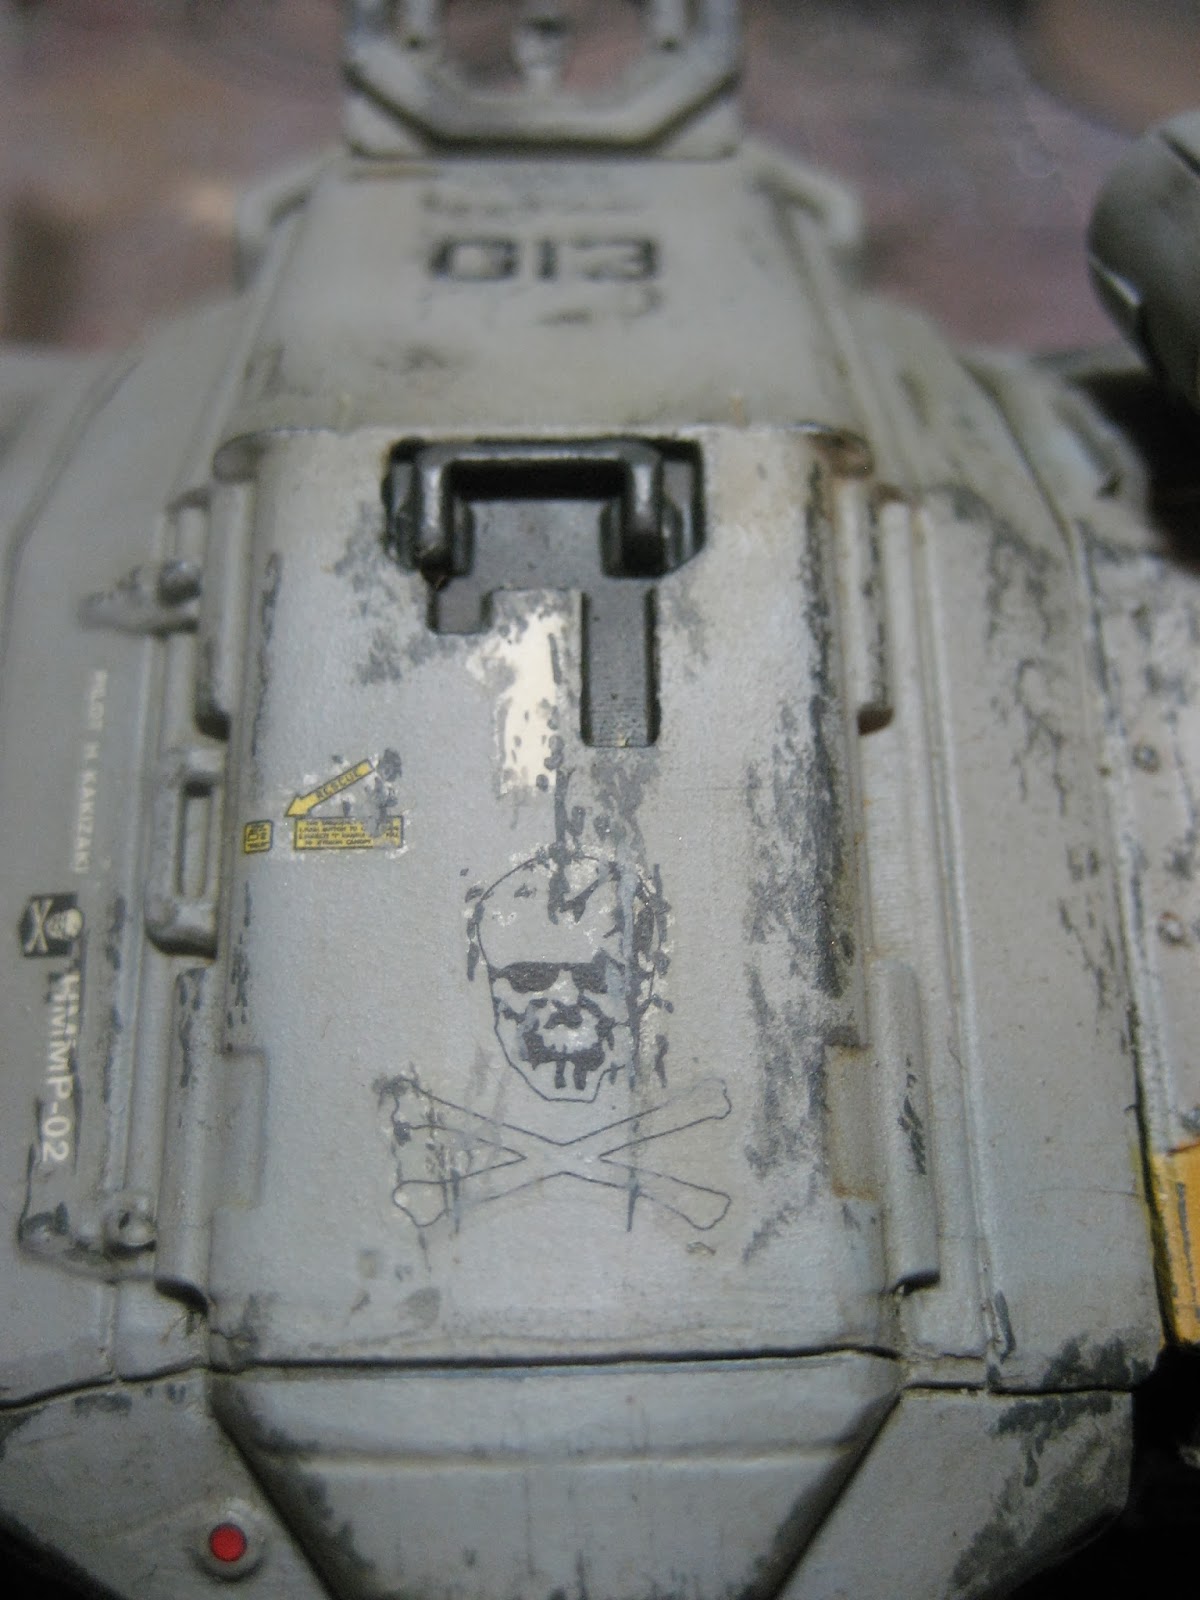
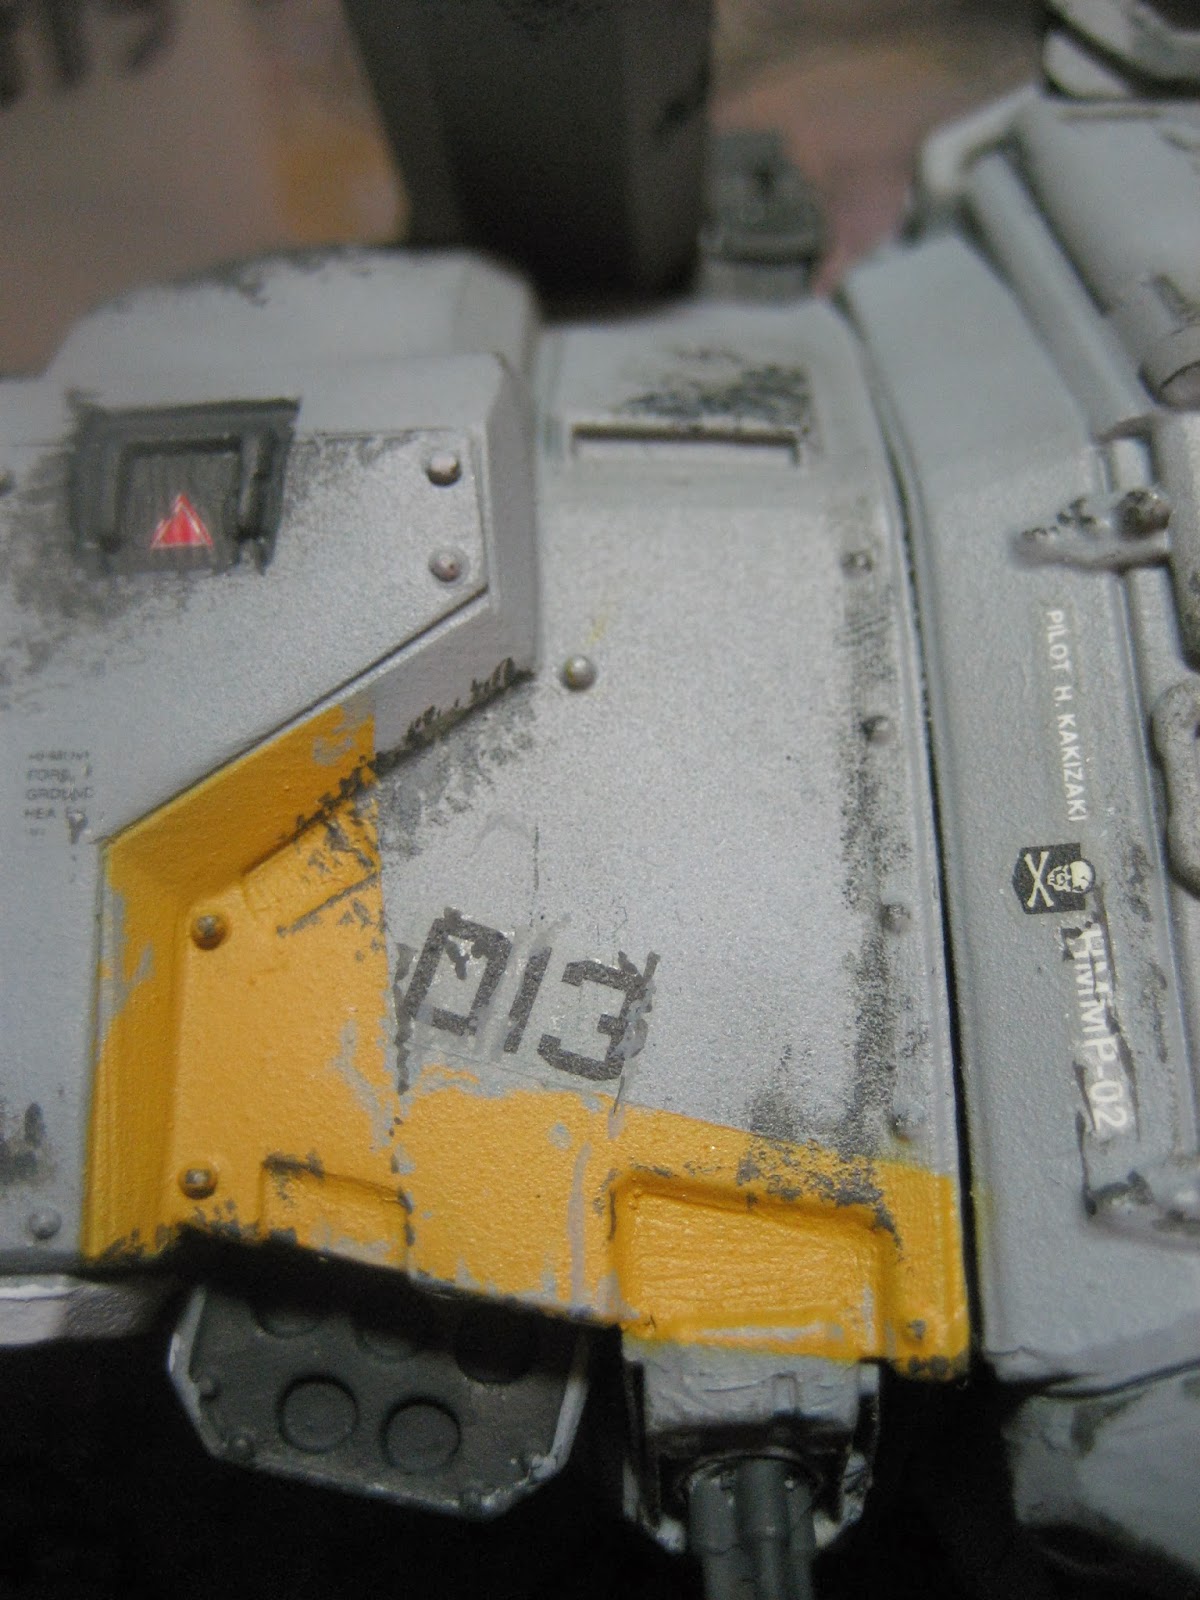
This is an image of the area before applying the mineral spirits.

Here is the same area with a coat of the mineral spirits. This is probably a bit more than I should have put on, but I was juggling a camera in all this, I actually let this layer evaporate a little before moving on. You will notice that the surrounding areas are flat. I prefer using a flat surface when working with oils, I know there is a lot of back and forth on this topic, but the way I look at it is canvas is a flat material, so maybe keeping my surfaces flat will help me work with the oils better.
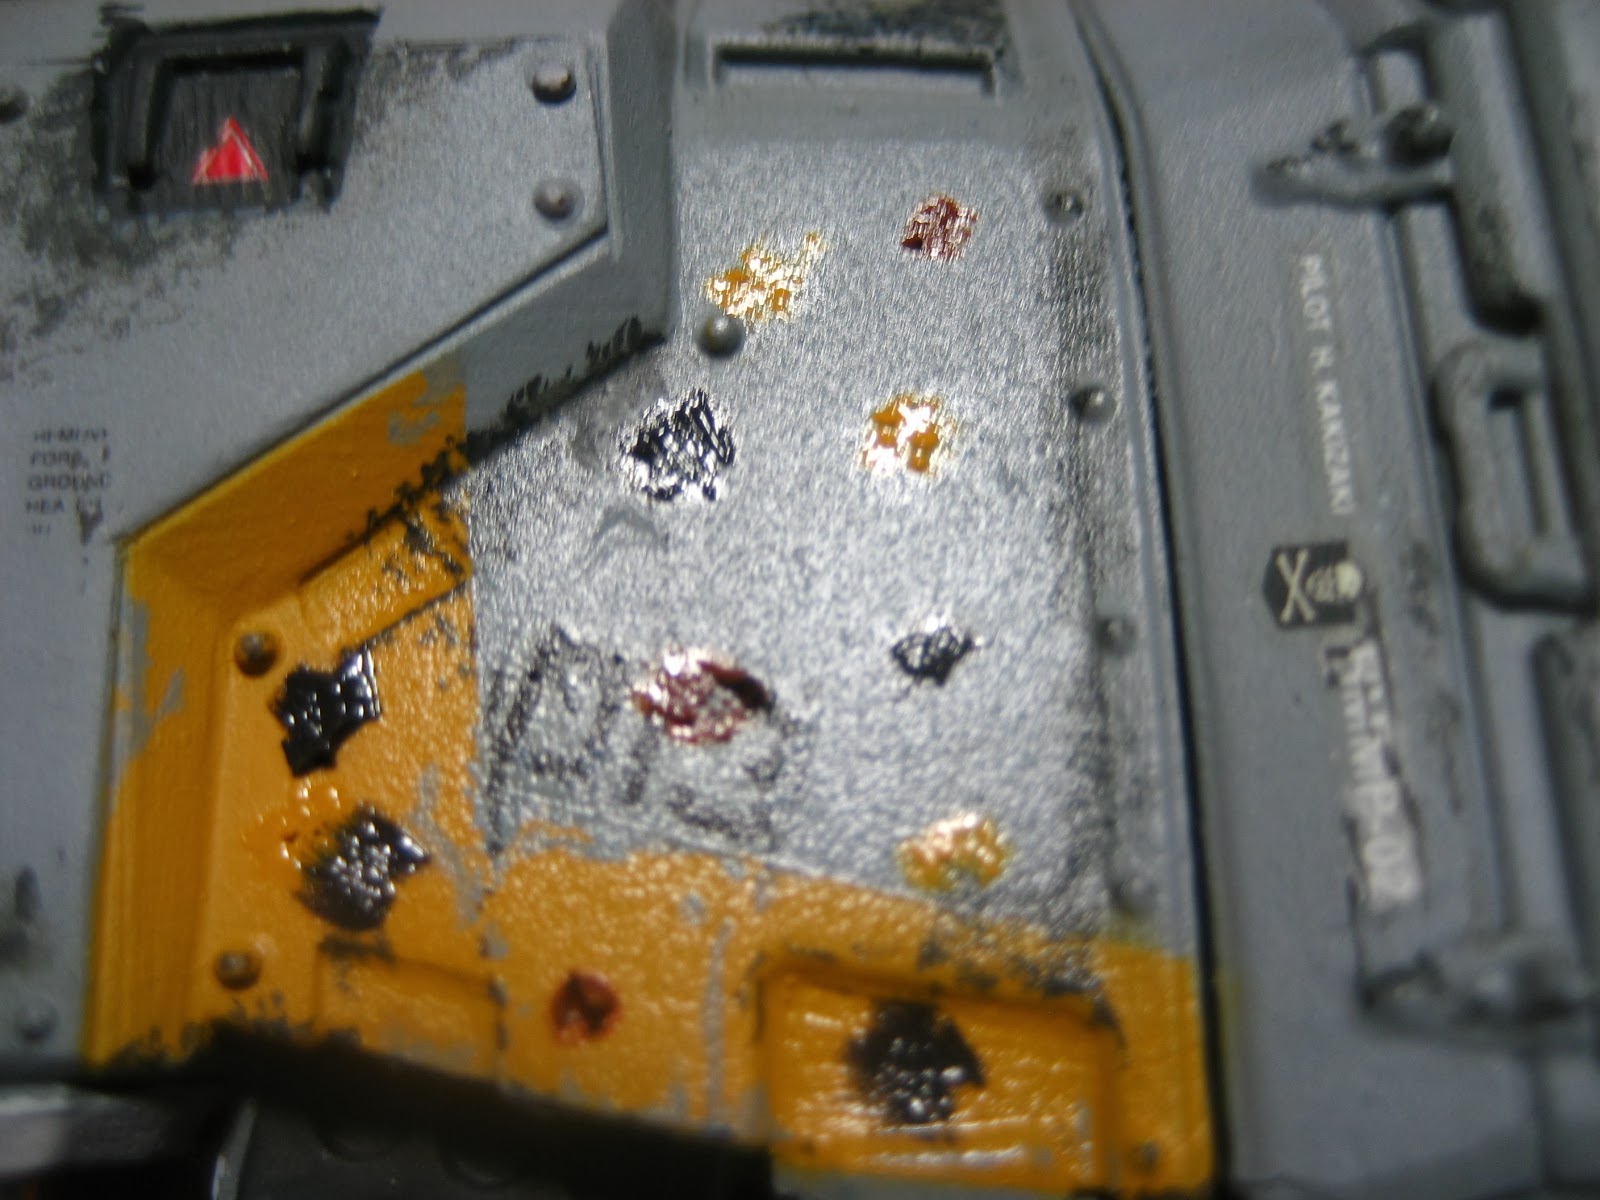
The next step is to randomly apply the chosen oil colors all over the area. There is no rhyme or reason to this, it is random and will all be blended together to create a nice, discolored surface. I keep as many brushes handy as colors I am using, that way you do not need to rinse between colors. As you can see from this photo as well, you do not need to be pretty about how the dots are applied. Also a word about color choice, there is no right choice. If I wanted to enhance the cool look of the original surface I would have gone with dark browns and blues and maybe some green, but I choose to go warm so I went with reds and yellows, the choice is yours, experiment and don't be afraid to mess up, you can fix it easily with oils.
 The next step is pretty simple. Get yourself a second wide flat brush(remember your first one was used to prep the surface, a second one will be used to blend the surface), dip it in your mineral spirits and "wick" as much of the excess off onto a paper towel, you will need to experiment with how wet you want your brush to be, but the basic idea is to begin to work in a vertical motion working your brush up and down blending all the colors together. If your brush is to wet, the colors will come off in one or two passes. If your brush is to dry, you will smear the colors all around, it really is about finding a balance that reflects the look you are after. I like to work is small sections at a time, it helps create variety in the over all appearance and allows me to easily step away for a bit and come back again if I need too.
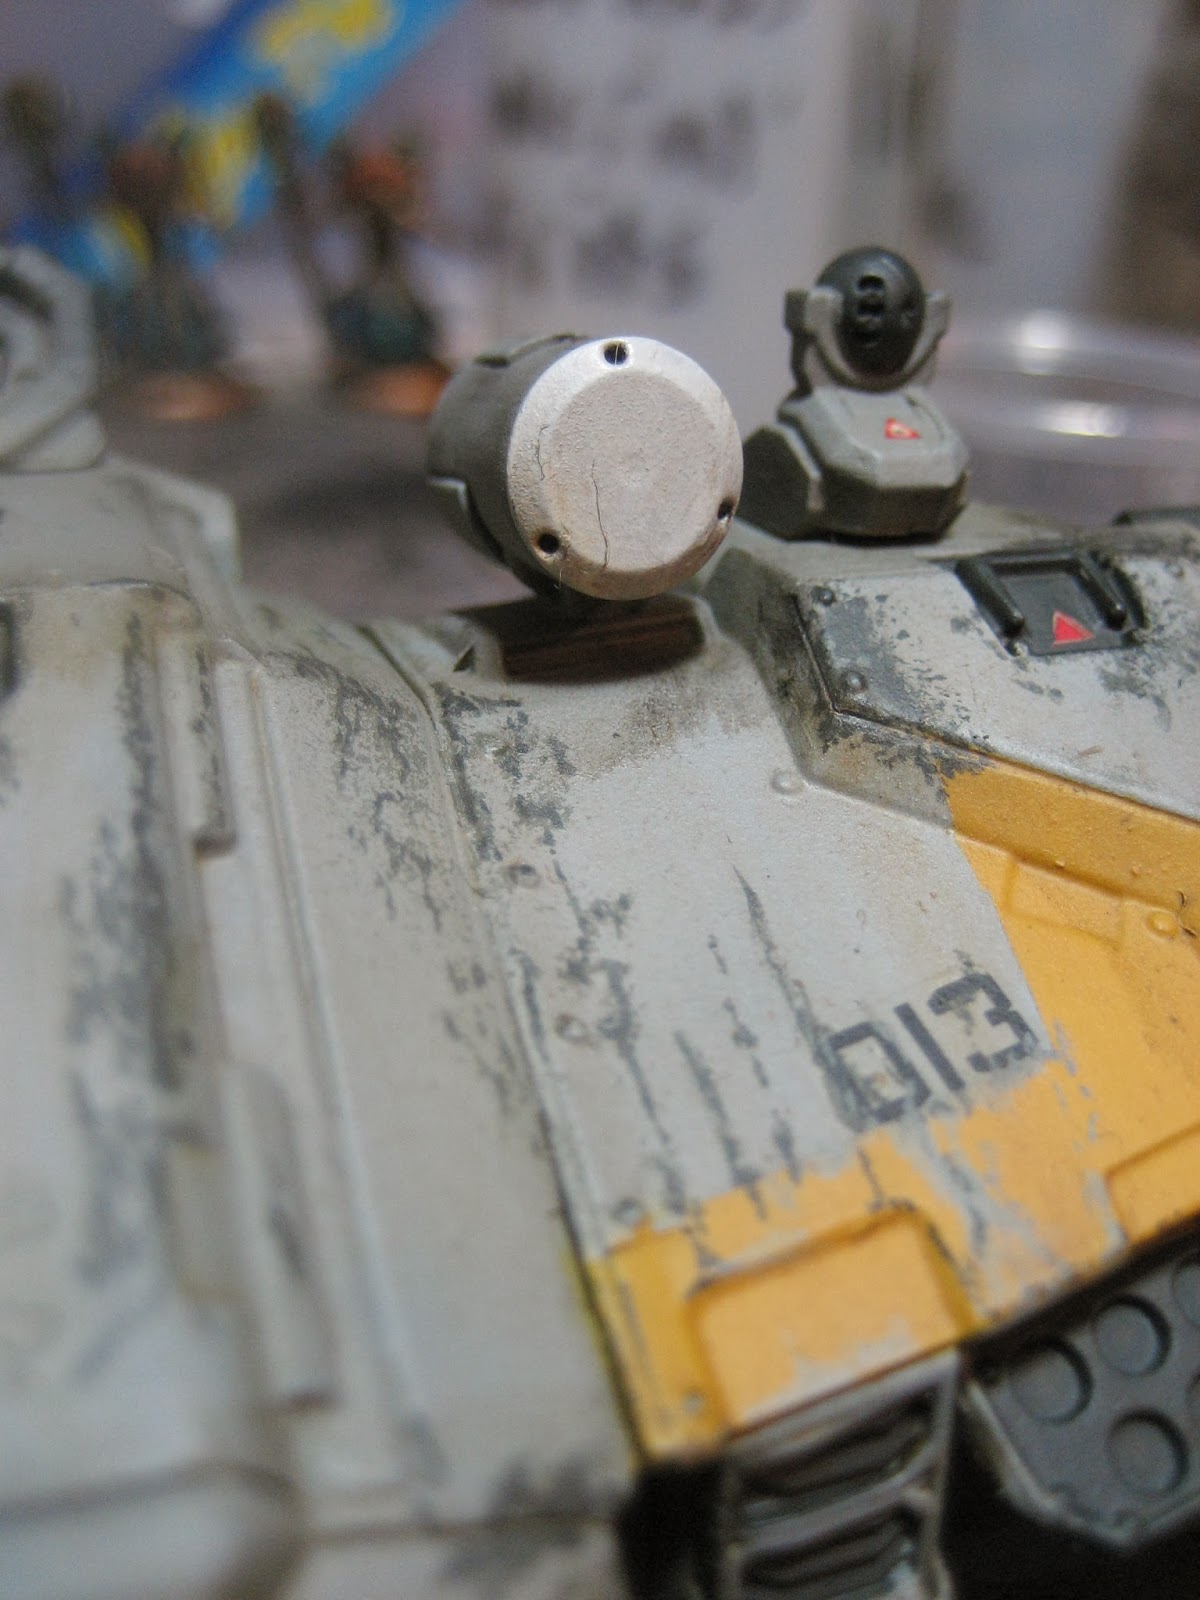
 Here is an image at about the half way point. I have completed the center cockpit area and the surfaces to the left of that. You can see the clear difference between the left and right side of the model. Notice how the chips on the left appear now to look more natural and the surface color appears blotchy and weathered in a very subtle way. Even the decals now look less like decals and more like they were painted on.
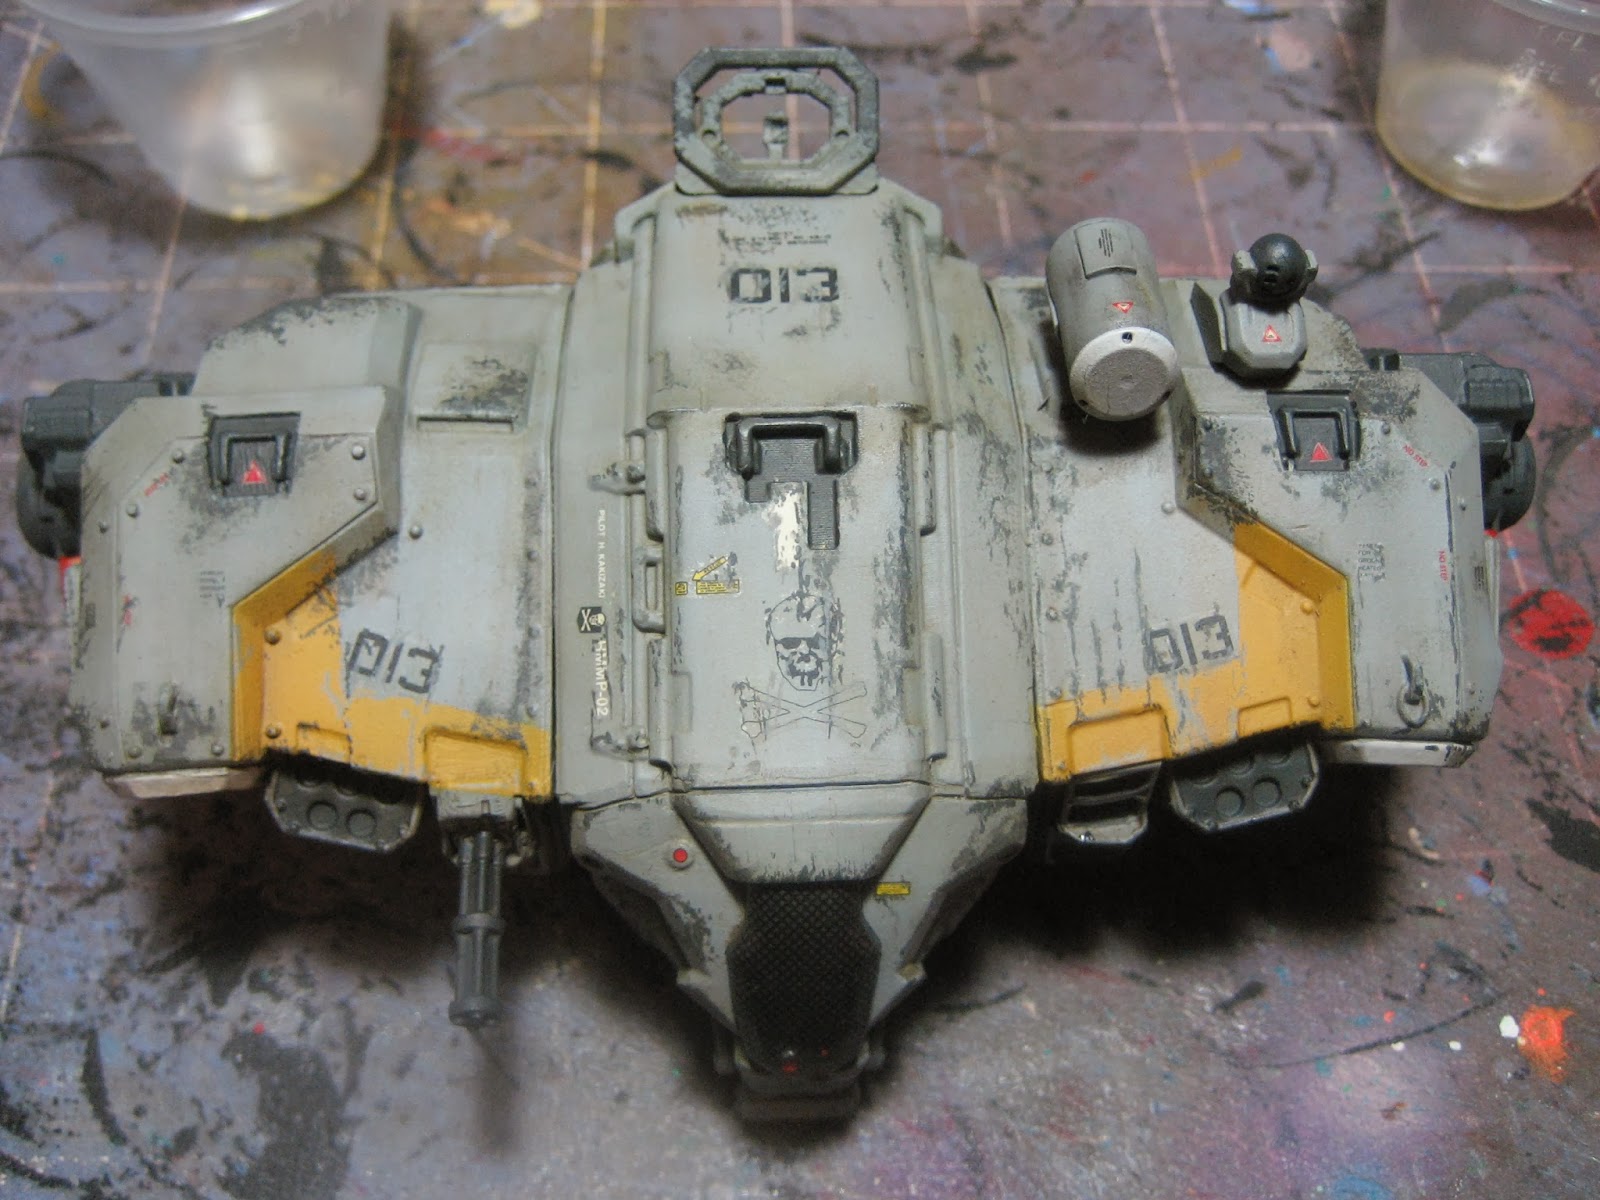
Here is another image showing the top completely weathered. At this point the model will be allowed to dry for 24 to 48 hours, and then sealed with an acrylic coat of Vallejo Matte Varnish and Future Floor Polish. I will then move onto discoloring individual panels to really add some more depth and variety to the surface of the mode.
One last thing with these last two images, it kind of shows an unintended result of this process. You can see how the oils paint has collected as a "muck" in some of the cracks and crevices, as I move on this will only increase and help show off more of the detail, although it looks like I need to go and remove a stray hair that found it's way onto the radar dish!